میکینگ آف ‘Bottles of Life’
فرید قنبری هستم و حدود 10 سالی هست که به عنوان ژورنالیست سی جی مشغول به کار هستم. تجربه کلی من شامل : بازیها ، تبلیغات، تجسم معماری ، موشن دیزاین، و جلوه های ویژه است که در نرم افزار های مایا، ریل فلو، مارولوس دیزاینر، سینمافوردی، سابستنس پینتر، فتوشاپ، و افترافکت ایجاد شده است.
برای آشنایی بیشتر با فرید قنبری توصیه میکنیم ، مقاله “آموزش ساخت قلعه در برف” را حتما مشاهده کنید .
در این آموزش، نحوه ساخت آخرین کارمو اموزش میدم. مهم ترین چیز در CG از نظر من به عنوان یک ارتیستتی که بخش های مختلف نرم افزارها رو عمیقا حفاری کرده اینه که بتونیم خلاقیت رو حفظ کنیم و نگاه هنرمندانه داشته باشیم.
در این پروژه بیشتر سعیم بر این بوده که بتونم به یک رندر چشم گیر با نورپردازی و تکسچرینگ قوی برسم.
رفرنس :
من همیشه مقداری از وقتمو صرف مطالعه قوانین هنر میکنم مثل قوانین نورپردازی . مبانی هنر و.. و بعدش پروژه رو که معمولا با جمع آوری رفرنس ها اغاز میشه رو استارت میزنم .
به کانسپت ها نگاه کنید واقعا قشنگن . مگه نه؟
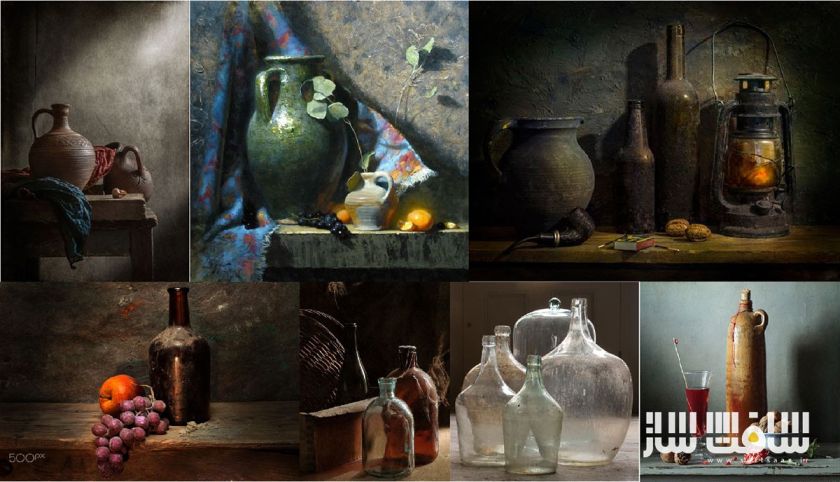
ولی خوب من دوست ندارم که کارهایی که میزنم خیلی ریل و واقعی باشه بیشتر ترجیح میدم که کارها هنرمندانه و باحال باشه . و خوب همیشه برای باحال شدن کارها یه خورده بهشون ادویه اضافه میکنم . مثلا شبیه نورهایی که ما اصلا تو این دنیا نداریم ? . یا مثلا اضافه کردن اون انگورهای شناور داخل بطری ها ؟?
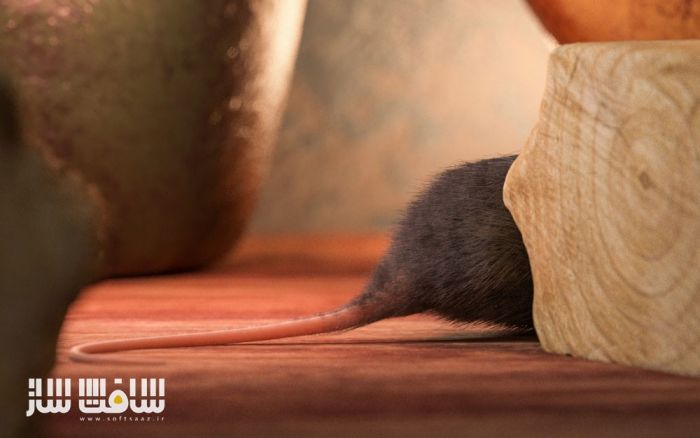
راستش بعضی این ایده ها موقع کار به ذهن ادم میرسه پس خیلی وقت خودتون رو صرف کشیدن کانسپت اولیه نکنید. مثلا او موش اخرین چیزی بود که به صحنه اضافه کردم.
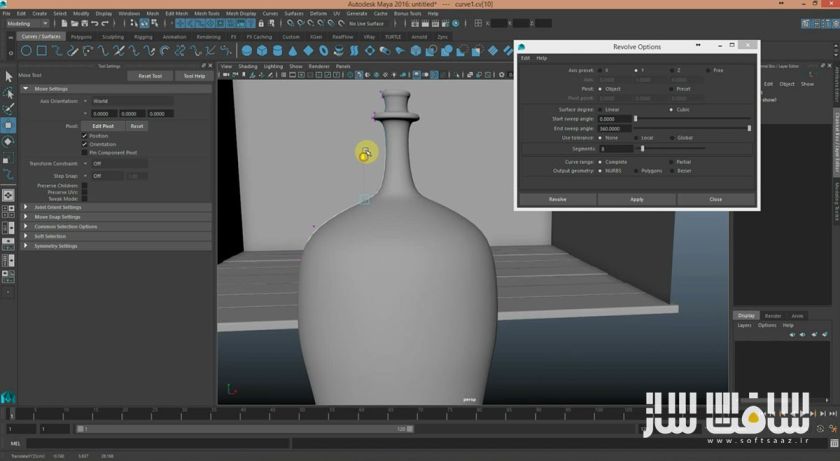
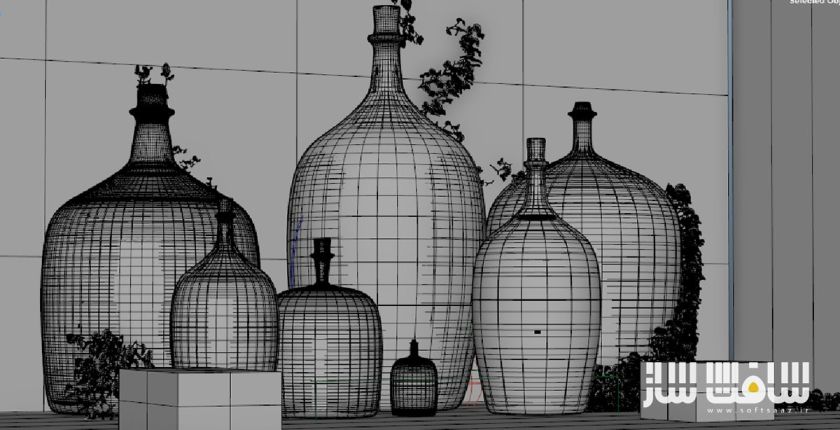
مدلینگ و اماده کردن سریع دروبین :
جمع کردن رفرنس ها و ساخت کانسپت اولیه ی خودتون خیلی باحاله . من معمولا 80 درصد کارو تو مایا انجام میدم.
مدلینگ رو با ادیت کردن ابجکت های ابتدایی شروع کردم .

بعد از بازی کردن با جایگاه مدل ها و زاویه دوربین، سعی کردم بهترین پوزیشن رو انتخاب کنم . خوب ممکنه این پوزیشن ها موقع کار تغییر پیدا کنن ولی نه اونقدرا…
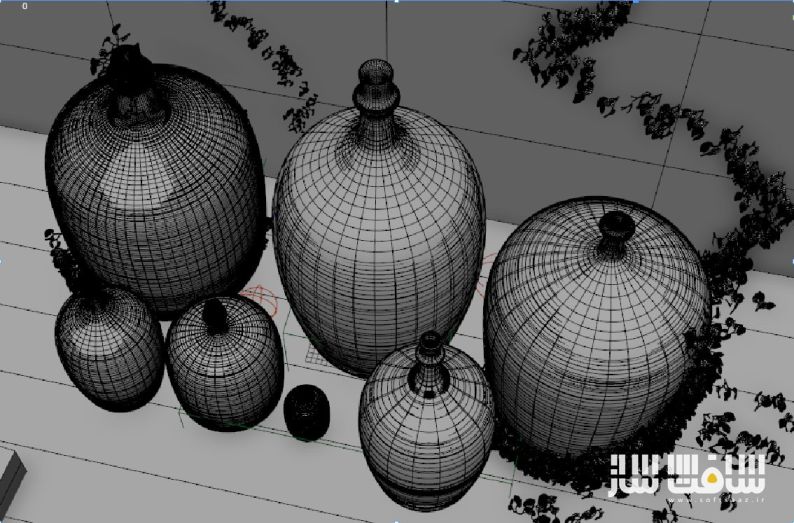
ممکنه نیاز باشه ساعت ها وقت صرف چیدمان و صحنه سازیتون کنین . در ضمن حواستون به نقطه های طلایی و آبجکتت های اصلیتون باشه.
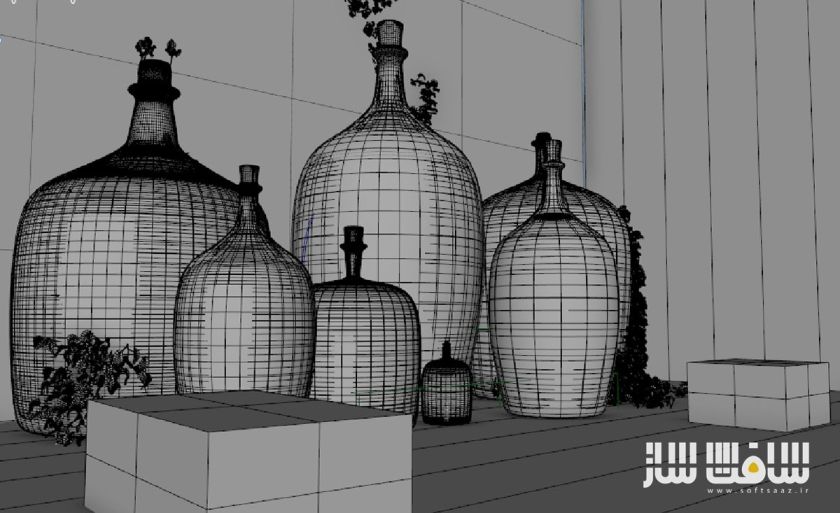
فراموش نکنید که همه تنظیمات دوربین رو امتحان کنید . آنقد با پارامترا بازی کنید تا به نتیجه دلخواهتون برسین . هیچ چیز غیرممکن نیست.
یه لنز 55mm برای صحنم گذاشتم
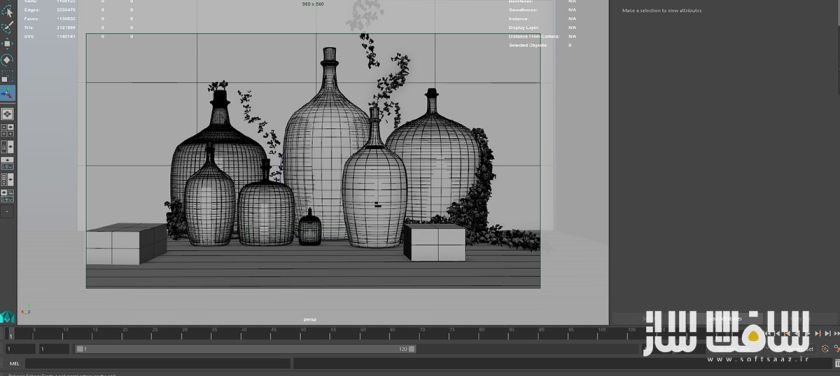
این فاصله کانونی رو دوس دارم . مرحله مدلینگ طی انجام کار کامل میشه . ممکنه که بخواید چیزایی رو اضافه یا حذف کنید
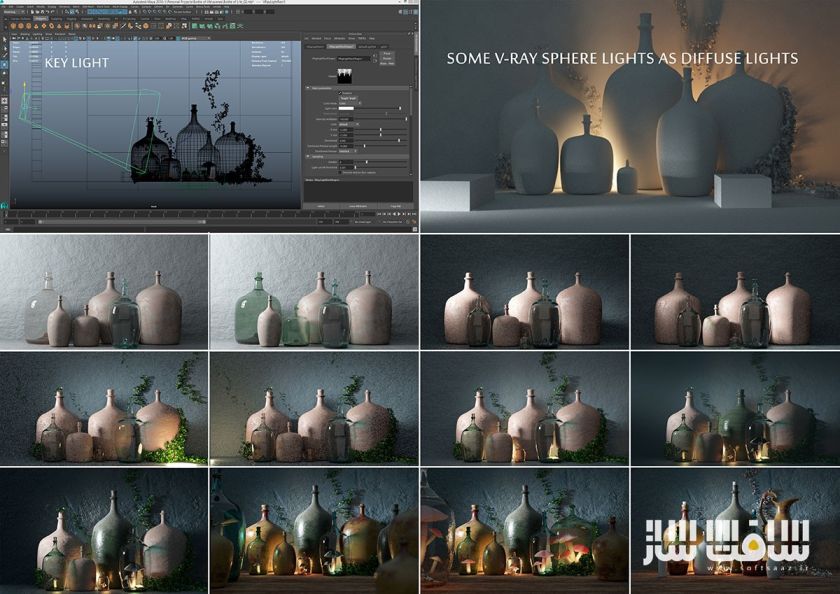
نورپردازی :
ترجیح میدم که روند کارم یه روند نموداری و الگووار باشه و وقتی رندرینگ رو شروع میکنم همون اول یک کلیتی از نتیجه نهایی داشته باشم.پس بنابراین وقتی که کارم با مدلینگ و زاویه دوربین تموم شد اولین نور اصلی و کلیدی رو به صحنه اضافه کردم که ببینم خوبه یا باید تغیراتی بدم هنوز.
این که با تنظیمات نور بازی کنید و یک بالانس بین روشنایی و تاریکی بوجود بیارید واقعا لذت بخشه. خوب برای توضیحات نهایی بگم که از یک نور v-ray Rec در حالت directional به عنوان نور کلیدی صحنه استفاده کردم و از تعدادی sphere light برای نور وسط بطری ها و یک dim dome light برای نشان دادن اون رنگ ابی کم در سایه ها استفاده کردم .
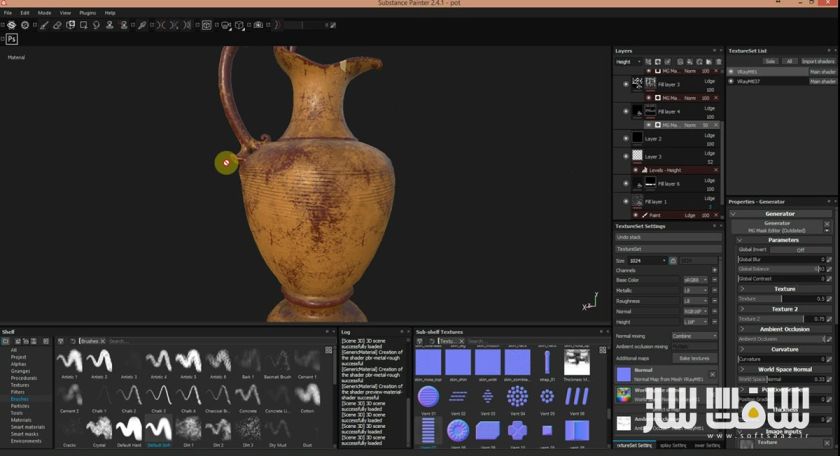
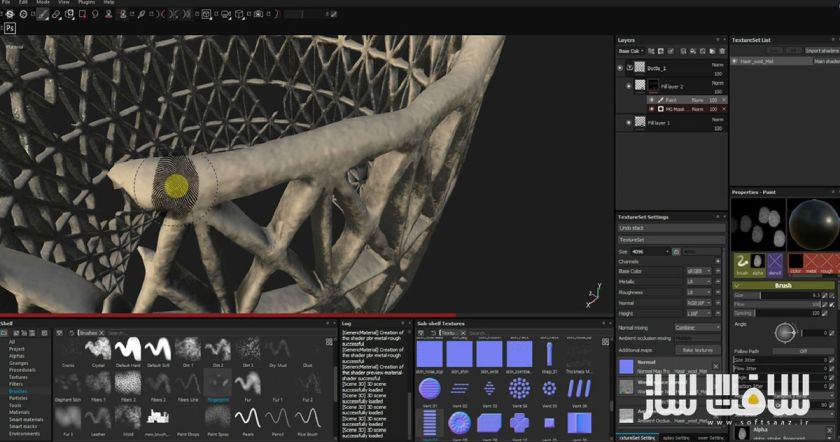
ساخت تکسچرهای واقعی در سابستنس پینتر
خوب حالا نوبت میرسه به جایی که اصلا هدفم از شروع این کار همین بود یعنی ساخت تکسچرهای واقعی . وقتشه که بریم سراغ نرم افزار قدرتمند ارتش سویس در تکسچرینگ . منظورم سابستنس پینتره.بدون substance painter این کار هرگز به وجود نمیومد . استفاده ازش راحته و قدرتمنده و اینترفیس خوبی داره.
با وارد کردن مدل هاتون بهش با یک uv ساده ، میتونید از امکانات خوب این نرم افزار مثل براش ها ،آلفاها. و کلیمتریال و تکسچر های خوب استفاده کنید. من معمولا اول یک رنگ ساده و کلی به مدلم میدم و بعد با استفاده از ماسک ها تکمیلش میکنم.
مپ های عالیه زیادی در substance painter وجود دراره ک میتونه کمکتون کنه . نکته مهم در ساخت تکسچرهای واقعی اینه که به تکسچرهای از پیش ساخته قبلی تکیه نکنید .
باید حواستون به جزییاتی که خودتون قراره بسازید مثل جای پا. گرد و غبار . خراش های روی چوب .کثیفی ها و حتی جای اشیایی که قبلا اونجا بودن و الان نیستن ( مثل اون رنگ ابی ای که روی میز هست و نشون دهنده یک کوزه در گذشته در اون مکان بوده )
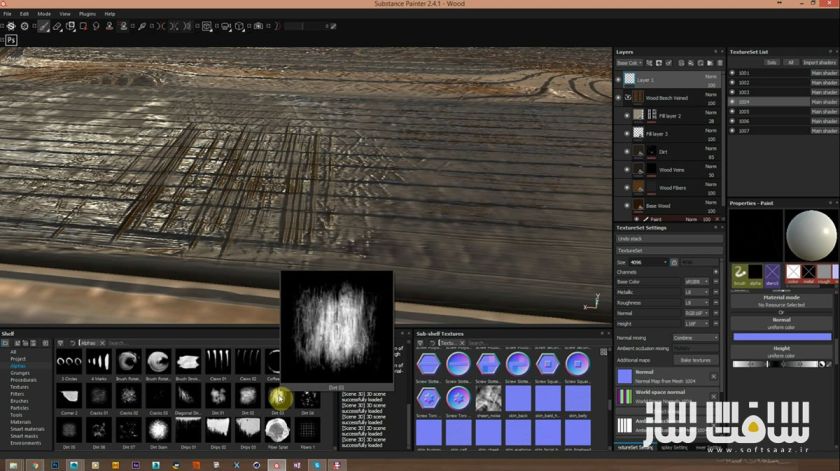
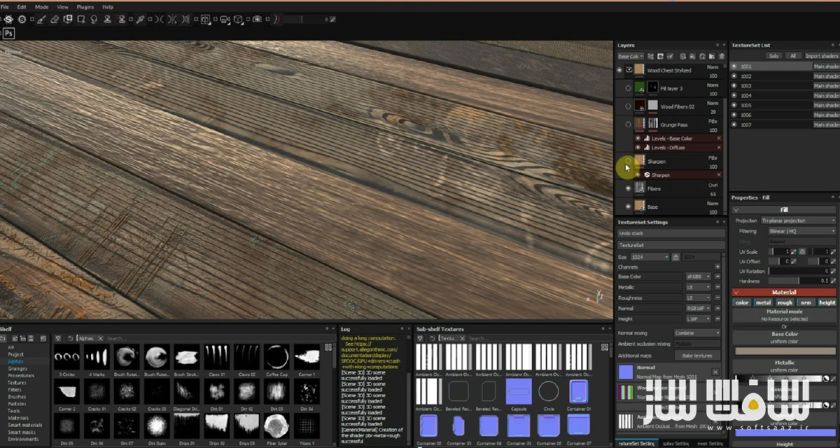
خوب وقتی تکسچرهایی که راضیم میکردن رو ساختم اونارو در اندازه ای 4k و 8k بیک کردم . ( مثلا برای میز، یک تکسچر 8UDIM با اندازه 8K از substance painter خروجی گرفتم )
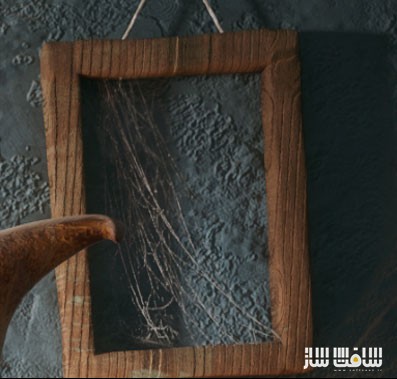
تارهای عنکبوت و نشون دادن کهنگی :
وقتی میخواید یه جایی رو نشون بدید که کسی مدت زیادیه نرفته . ساختن تارهای عنکبوت میتونه به شما کمک کنه .
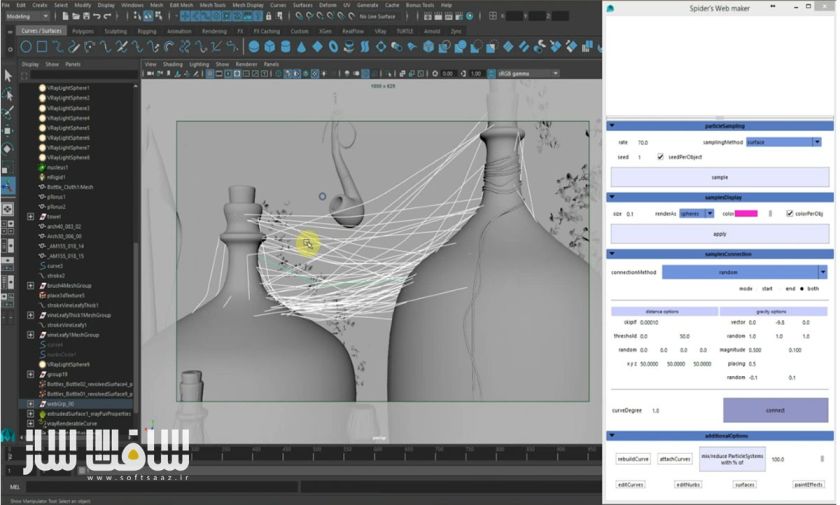
من از دو تا تکنیک برای ساخت اونا استفاده کردم یکی مدل کردن با curve و تکسچرکردن با opacity map . یکی هم به کمک اسکریپت SPIDER’S WEB MAKER که میتونید بوسیله اون به راحتی تارعنکبوت بین مدل هاتون ایجاد کنید .
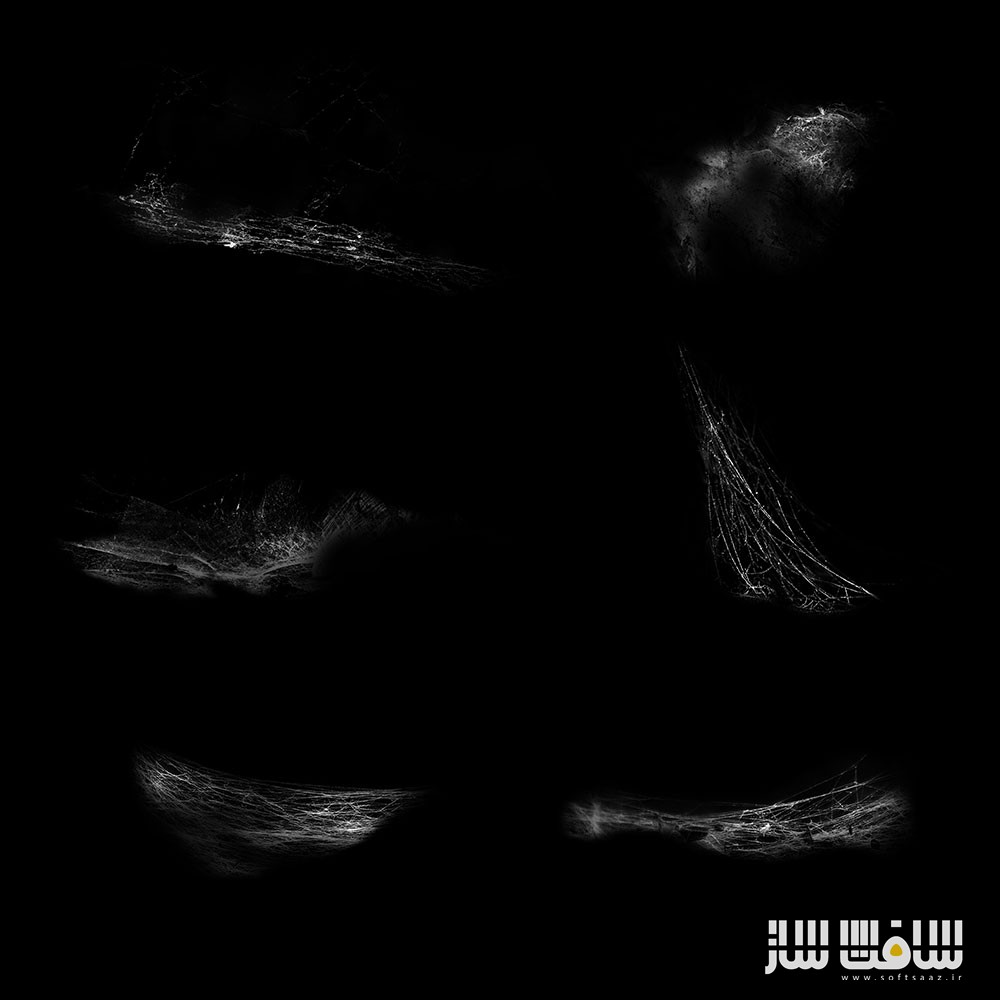
برای تکسچر اونها از یک تکسچر ساده سیاه و سفید استفاده کردم که از سایت http://www.creativeshrimp.com/ گرفتم. و یک متریال ساده VRAY
اضافه کردن جزییات نهایی :
خوب کارمون دیگه تقریبا تمومه. از نتیجه نهایی راضی ام و تکسچر و نورپردازی خوب از آب در اومده . خوب دیگه به چی نیاز داریم ؟ وقتشه یه خورده تایم صرف جزییات کنیم.
همونطور که بالاتر گفتم موش رو اخر کار اضافه کردم . (شاید باورتون نشه ولی ایده موش وقتی به ذهنم اومد که برای هواخوری رفته بودم بیرون و دیدم یه موش بزرگ اونجا داره برا خودش میچرخه)

تنظیمات نهایی رندر و المنت ها :
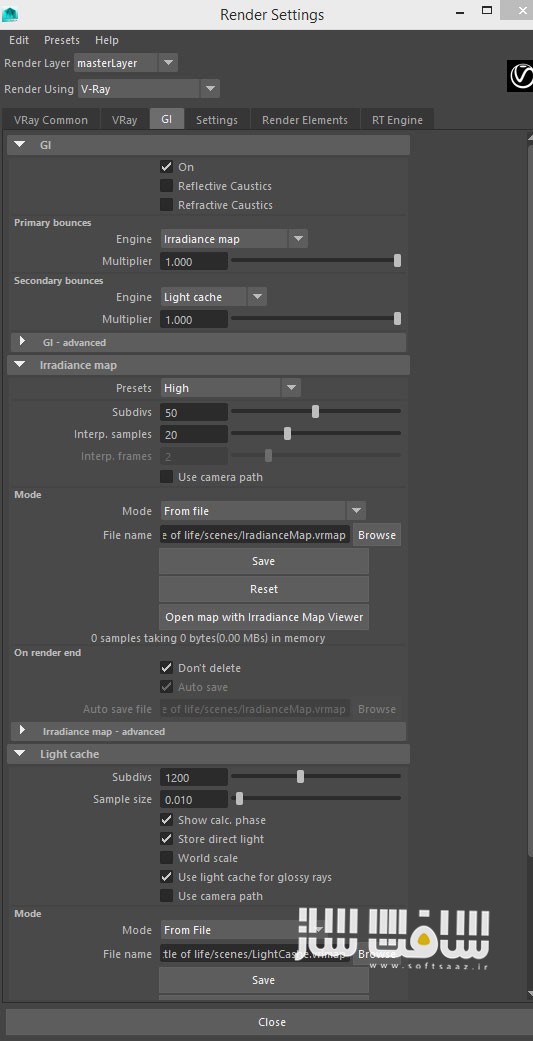
این کارو در رزولوشن 2400 رندر کردم . از اونجایی که ضریب شکست های نور زیادی در اندازه های 4k و 8k داریم باید حواسمون باشه که رندر رو اوپتیمایز شده بگبریم که خیلی وقتمون رو نگیره . فراموش نکنید که از نورها و مپ ها کش (cache) بگیرید . واقعا این کار براتون وقت میخره
پست پروداکشن
خوب حالا وقتشه که لایه هاتون رو در نرم افزار کامپوزیتتون که برای من فتوشاپه، کامپوزیت کنید . من خودم خیلی از پست پروداکشن کردن خوشم نمیاد ,دوست دارم که از نرم افزار 3D بهترین رندر رو بگیرم . برا همین فقط یه خورده مه(fog) به سمت چپ تصویر اضافه کردم ویک تنظیم رنگ کوچک.
تایم لپس نحوه مدلینگ اثر و انجام کار :
Making of ‘Bottles of Life
My name is Farid Ghanbari and I have been working as a CG Generalist for about 10 years. My overall experience includes games, advertising, architectural visualization, motion design, and VFX mostly created in Maya, Realflow, Marvelous Designer, C4D, Substance Painter, Photoshop, and After Effects.
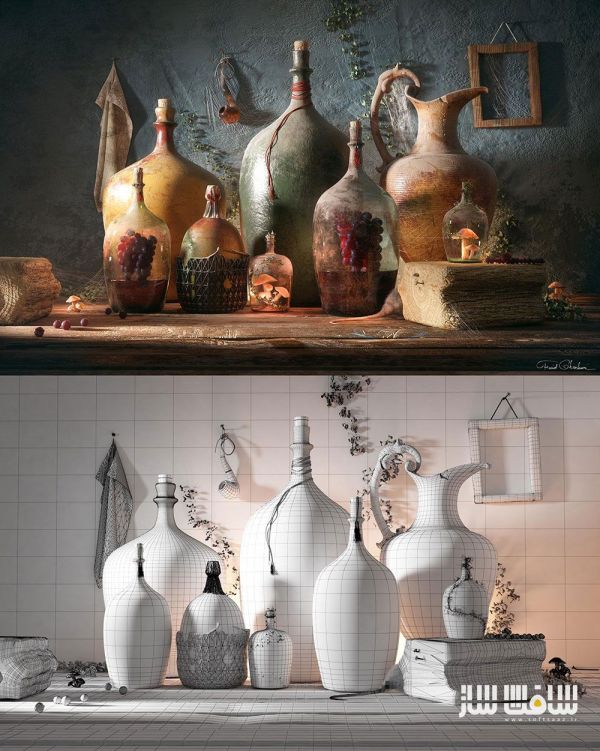
In this tutorial will show you the process of my last artwork “Bottles of Life.” The most important fact for me as a CG artist delving deep into all the facets of the software, is to hold on to the creativity and artistic look of the final result. In this particular project I intended to achieve something eye-catching with perfect lighting and detailed textures!
Fire up the project (references)
I always spend some time to study art fundamentals like lighting principals, color scripts, photography rules, and then finally fire up the project by the first step which is always gathering references to me! Just look at these references. They are awesome, aren’t they?!
But, as I mentioned I don’t like to just create something crazy realistic! I need it to be artistic and magical! In fact, in this part I usually add some spice. For example, how about adding some extra lights which we don’t have in the real world! How about some levitated grapes in those bottles which have not been affected by gravity! To be honest some of these spices will be added during the process. So don’t push your whole energy to finalize your concept at this level! (e.g. the last thing I added to “Bottles of Life” was the rat tail.)
Quick Modeling and setting up the camera
Gathering references and creating your own first concept is a lot of fun! I usually use Maya for 80% of the project. I started from scratch by modeling the initial shapes and blocks!
After playing with object positions and different camera angles, I choose the best camera view and best composition for the scene! Of course this may change as the project goes forward. But not too much! Maybe just some adjustments!
You may need to spend hours to find the best angle for your camera! Care about golden points and concentrate on your heroes in the scene!
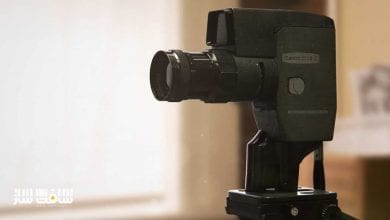
Do not forget to play with all the camera parameters such as angle of view, film gate, camera rolling and focal length, besides tilting, panning and zooming!
I chose a 55mm lens for “Bottles of Life”
Love this focal length! The modeling section will be finalized during the process and you may add something new
Lighting
I prefer to have a schematic look of the final result as the project goes forward! So once I have achieved my first setup in modeling with main objects, I add a key light to see if I should continue or pick some other road to drive down! It’s enjoyable to tweak the lights and try to set up the balance of dark and light.
To recap on lighting: I used a V-Ray Rec light in directional mode as Key Light. Some V-Ray Sphere lights among the bottles. I also applied a dim Dome light for a blue tint over the dark shadows
Creating realistic textures in Substance Painter
Looking back to my goal for this particular project – perfect lighting and realistic, detailed textures – it’s time to meet the Swiss army app of 3D texturing. I mean the great Substance Painter. Without Substance Painter “Bottles of Life” would never have been born! It’s easy to use, smart and user friendly! By importing your object with simple UVs and baking the texture in Substance Painter, you will have many abilities such as brushes, alphas, smart material and lots of procedural textures. I usually start by simply filling the layers for the base color, and then proceeding with smart masks.
Curvature and ambient occlusion are the most important maps. You can also benefit from a world space map to define the top parts of your objects to easily apply the dust effect
The important point when creating realistic textures is to not rely on smart or procedural pre-provided nodes. You should care about all man-made imperfections such as footprints, effects on dust, wood scratches, special dirt, or even the effects of some absent objects in your scene which may have been there in the past. (Look at the blue ring on the table which tells you there had been a paint pot here)
When I get the satisfying result with all the desired detailed textures, I bake them in 4K or even 8K for some larger objects! (e.g. I created 8 UDIM textures for the table in Maya and 8k export from SP).
Spider webs and age
When you want to show an old forgotten place, spider webs come into play. I used 2 techniques for these: modeling with surface curves, and textures with opacity map! With the SPIDER’S WEB MAKER script, you can easily define your web between objects with your own options. For the opacity spider webs, I just used a simple black-and-white texture which I found from Gleb Alexandrov’s website, with a simple V-Ray material.
Adding final details
Well, we are almost done! I’m happy with the final detail on the models, and the lighting and textures are very nice. What more do we need? I just spend some time on the final touches. As I mentioned above, I added the rat tail here. (Believe me or not this idea was created in my mind right after seeing a big rat fooling around in our apartment dumpsters when I stood up for getting fresh air in front of the window!)
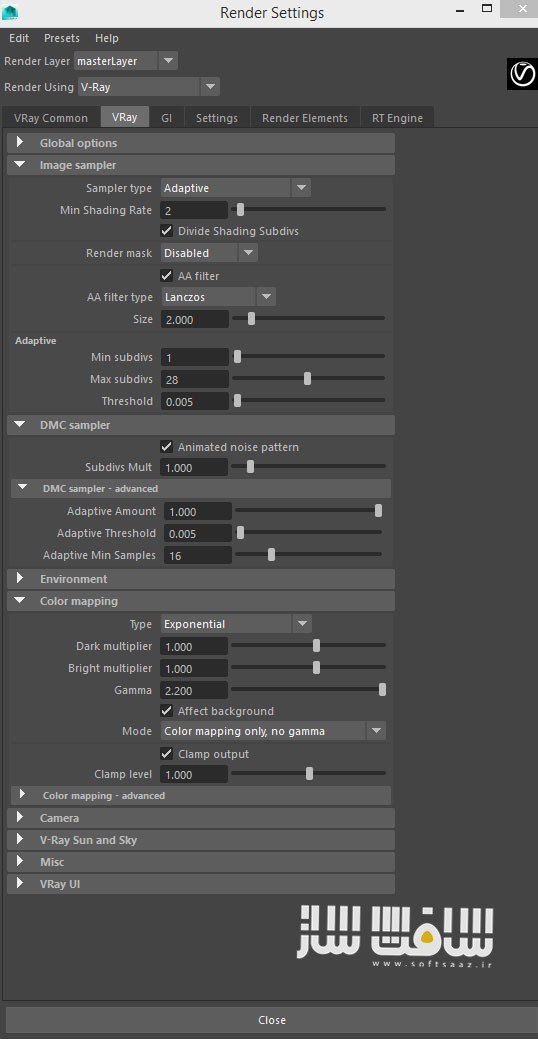
Final render setting & render elements
I rendered “Bottles of Life” in 2400 res. As we have many refractions with 4k and 8k textures, this is really important to have an optimized render setting to save time. Don’t forget to bake the irradiance and light cache maps! They really save you time!
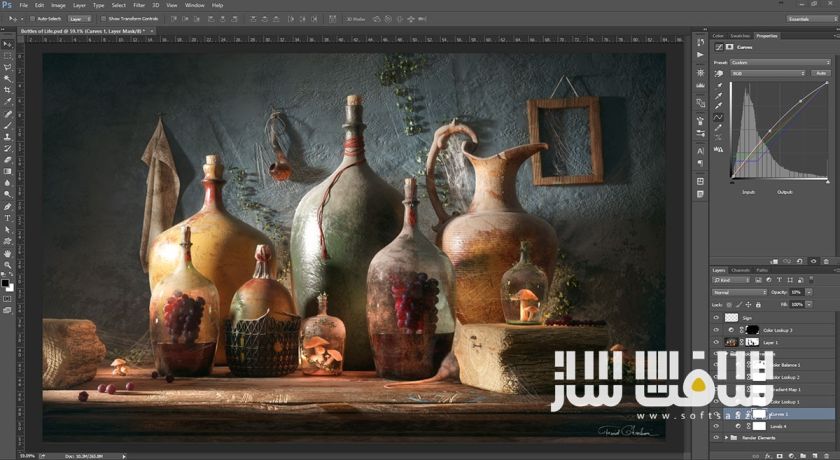
Final touches in post-production
Now it’s time to composite the layers in your composition app which is Photoshop for me. I am not a fan of much post production. I love to achieve the highest percentage of final result in the 3D application. So I just added some fog effects to the left side of the image, and a slight color corrections.
To finish, I just want to recommend that CG artists use their own objects, and their own artistic style! Do not try to fill up your scene with pre-provided objects found on the internet! I hope you like this written breakdown and will benefit from it!
منبع خبر : سایت تری دی توتال
نویسنده : محمد مهدی قاسمی
امتیاز دهی به این مطلب:
امتیاز سافت ساز - 89%
89%
لطفا به این مطلب امتیاز دهید.