مدلینگ و تکسچرینگ ساختمان در تری دی مکس 3ds Max
Modeling and Texturing a Next-gen Building for Games in 3ds Max

مدلینگ و تکسچرینگ ساختمان
در این آموزش ” مدلینگ و تکسچرینگ ساختمان ” از شرکت Digital Tutors مربی دوره Brandon Volpe ، مدل سازی و تکسچرینگ سه بعدی ساختمان را در 3ds Max و Quixel آموزش می دهد.با استفاده از یک عکس مرجع به ایجاد نمای یک ساختمان با بافت و با استفاده از تبدیل شبکه ها به تکه های مدولار آموزش آغاز می شود.
سپس در تری دی مکس به مدل سازی نمای ساختمان می پردازد و shader های مبتنی فیزیکی را آموزش می دهد.در نهایت با استفاده از پلاگین Quixel SUITE و نرم افزار فتوشاپ نور و پیش نمایش مدل و بافت آن را تمام می کنیم.با سافت ساز همراه باشید .
عناوین اصلی دوره مدلینگ و تکسچرینگ ساختمان در مکس :
- تنظیمات رفرنس ساختمان
- تنظیمات شیت تکسچر
- آموزش ایجاد نرمال مپ
- تنظیمات رفرنس تصاویر در مکس
- ایجاد مدل کاغذ 2D
- استفاده از ابزار Snap
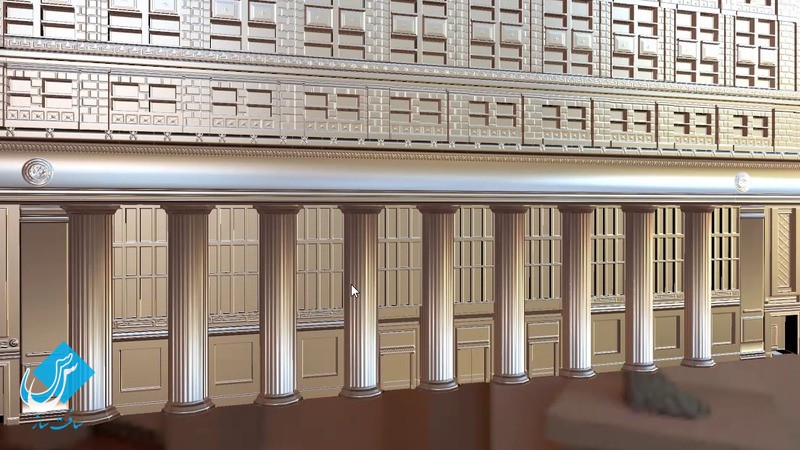
- ایجاد هندسه بالا ساختمان
- مدلسازی ستون
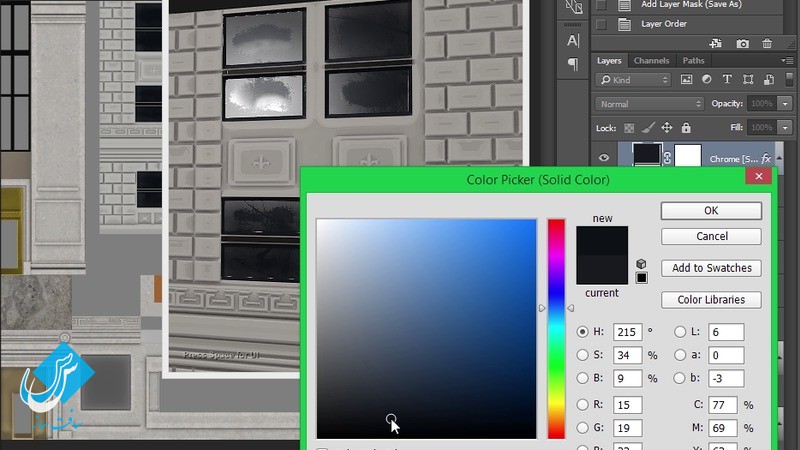
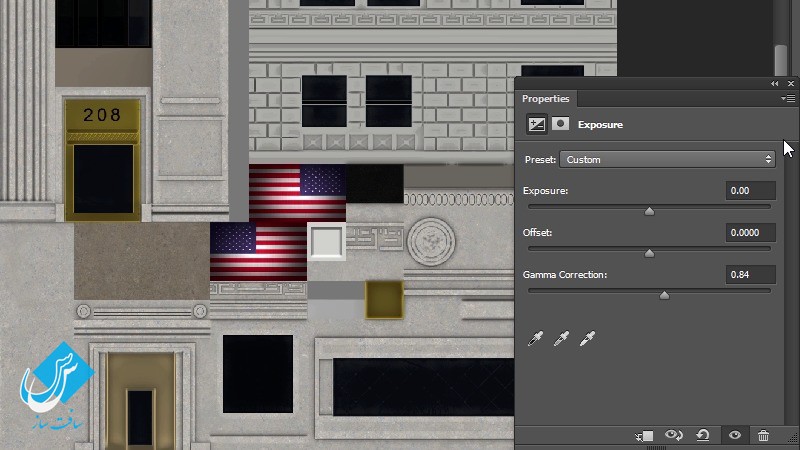
- ایجاد متریال ID Mask در فتوشاپ
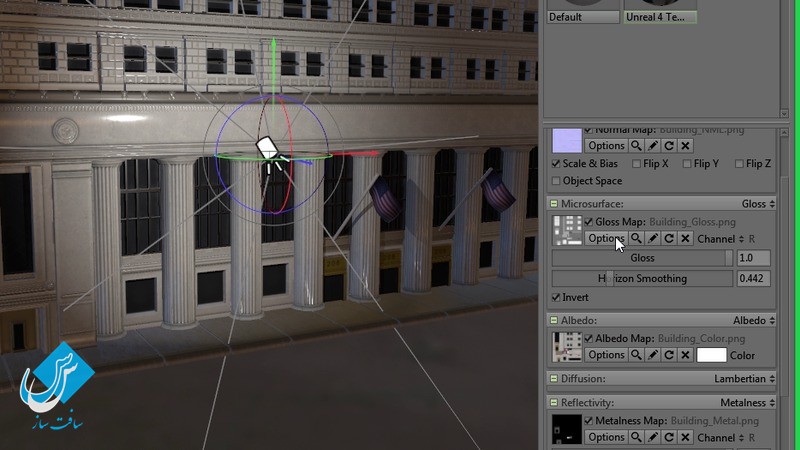
- پیش نمایش Material ID در Marmoset Toolbag
- ایمپورت نرمال مپ و Material ID مپ
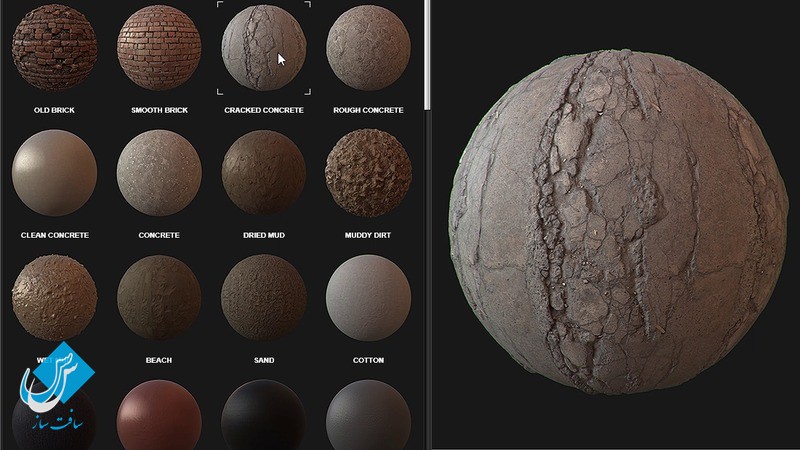
- ایجاد تکسچر PBS در Quixel’s DDO
- ایجاد تکسچر بتن در DDO
- ایجاد تکسچر برنز ، برنج ، مس
- ایجاد تکسچر پنجره
- ایمپورت مدل به Marmoset Toolbag
- تغییر هندسه ستون ها
- ایجاد نورپردازی در Marmoset Toolbag
- تنظیم دیفیوز مپ برای نورپردازی
- ساخت صحنه بارانی و نورپردازی آن
- و …
تصاویری از دوره مدلینگ و تکسچرینگ ساختمان :

پیشنمایش دوره مدلینگ و تکسچرینگ ساختمان در مکس :
عنوان دوره : pluralsight – Modeling and Texturing a Next-gen Building for Games in 3ds Max
سطح : متوسط
زمان کل دوره : 6 ساعت
تعداد فایل های تصویری : 39
سال آموزش : 2016
فایل تمرینی : دارد
مربی دوره : Brandon Volpe
نرم افزار : 3ds Max 2012, Photoshop CC 2015, Quixel SUITE 1.8, Marmoset Toolbag 2
زیرنویس : ندارد
pluralsight – Modeling and Texturing a Next-gen Building for Games in 3ds Max
Throughout these lessons we’ll cover the modeling and texturing of a next-gen building in 3ds Max and Quixel. We’ll start by using a reference photo to create a texture sheet and how to use the grid to make the modular pieces. We’ll then go into modeling and making our physically based shaders. Additionally we’ll create the normal maps with Quixel’s NDO. Finally, we’ll light and preview our model and textures in Marmoset Toolbag.
1 Introduction and Project Overview 01:04
2 Setting up the Full Building Reference 08:58
3 Determining our Needs for Texture Sheet 09:43
4 Setting up our Texture Sheet 08:35
5 Working on our Texture Sheet 09:23
6 Completing our Texture Sheet 10:13
7 Learning the Basics of Normal Map Creation 06:58
8 Making our Normal Maps 09:14
9 Detailing our Sections 10:35
10 Creating a 2D Plane and Detaching our Modular Pieces 08:30
11 Setting up a Reference Photo in 3ds Max 10:12
12 Creating a 2D Paper Model 09:38
13 Using the Snap Tool 09:55
14 Creating the Top 3D Building Geometry 09:13
15 Creating the Right Side 3D Geometry 12:22
16 Modeling the Columns 05:52
17 Creating the Middle of the Building 09:48
18 Creating the Left Side 3D Geometry 09:58
19 Creating the Material ID Mask in Photoshop 11:51
20 Previewing the Normals and Material ID in Marmoset Toolbag 09:53
21 Importing the Normal Map and the Material ID Map 09:23
22 Creating the PBS Textures in Quixel’s DDO 10:53
23 Creating all our Materials 11:00
24 Setting up our Masks for all Materials 07:49
25 Creating the Concrete Texture in DDO 09:39
26 Creating the Brass, Copper, and Bronze Textures 11:14
27 Creating the Windows Texture 07:24
28 Adjusting all the Textures in DDO 06:16
29 Importing our Model into Marmoset Toolbag 08:48
30 Making more Changes to the Geometry 07:52
31 Changes to the Pillar Geometry 09:32
32 Creating the Sidewalk Geometry and the Flag Poles 11:37
33 Exporting our Building to Preview it in Marmoset Toolbag 08:37
34 Tweaking our Textures 07:16
35 Creating the Lighting in Marmoset Toolbag 09:33
36 Modifying our Textures to Add More Detail 11:32
37 Finishing the Lighting and Final Touches for Rendering 13:13
38 Adjusting the Diffuse Map for a Different Lighting Setup 12:10
39 Making a Rainy Scene and Changing the Lighting 10:21
دانلود با لینک مستقیم و سرعت بالا :

برای دسترسی به کل محتویات سایت عضو ویژه سایت شوید
برای نمایش این مطلب و دسترسی به هزاران مطالب آموزشی نسبت به تهیه اکانت ویژه از لینک زیر اقدام کنید .
دریافت اشتراک ویژه
مزیت های عضویت ویژه :
- دسترسی به همه مطالب سافت ساز بدون هیچ گونه محدودیتی
- آپدیت روزانه مطالب سایت از بهترین سایت های سی جی
- بدون تبلیغ ! بله با تهیه اکانت ویژه دیگه خبری از تبلیغ نیست
- دسترسی به آموزش نصب کامل پلاگین ها و نرم افزار ها
اگر در تهیه اشتراک ویژه مشکل دارید میتونید از این لینک راهنمایی تهیه اشتراک ویژه رو مطالعه کنید . لینک راهنما
For International user, You can also stay connected with online support. email : info@softsaaz.ir telegram : @SoftSaaz
امتیاز دهی به این مطلب :
امتیاز سافت ساز
لطفا به این مطلب امتیاز دهید ☺️