دانلود آموزش ایجاد نقشه های مونتاژ در AutoCad
Creating Assembly Drawings in AutoCAD
ایجاد نقشه های مونتاژ در AutoCad
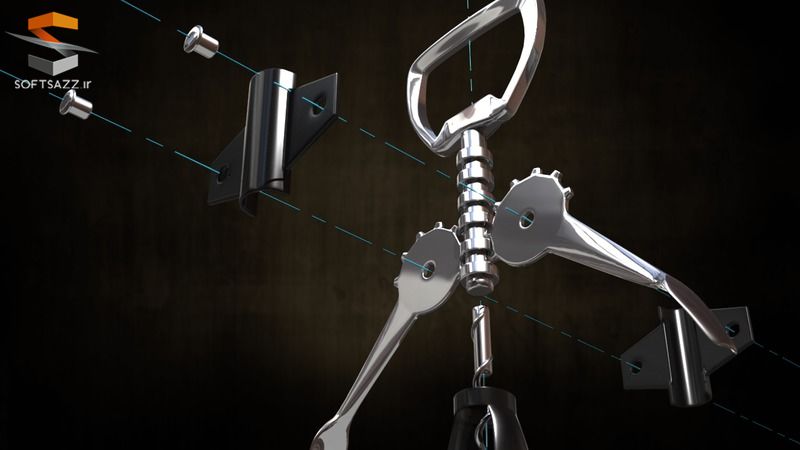
در این آموزش از سایت pluralsight در نرم افزار AutoCad ، نحوه استفاده از محیط و ابزار سه بعدی نرم افزار و ایجاد نقشه های مونتاژ را یاد خواهید گرفت. این آموزش در رابطه با مدلسازی بدنه درب باز کن بطری با استفاده از چند سطح و ابزار مدلسازی solid شامل : planar, extrude و subtract. در پایان آموزش قادر خواهید بود که با استفاده از محیط 3d اتوکد ، نقشه های مونتاژ رو به صورت موثر و سریع ، طراحی نمایید با سافت ساز همراه باشید.
عناوین اصلی این دوره آموزشی:
- ایجاد سطوح و مواد جامد از خطوط 2D
- ایجاد اتصالات و پیچ برای درب بازکن
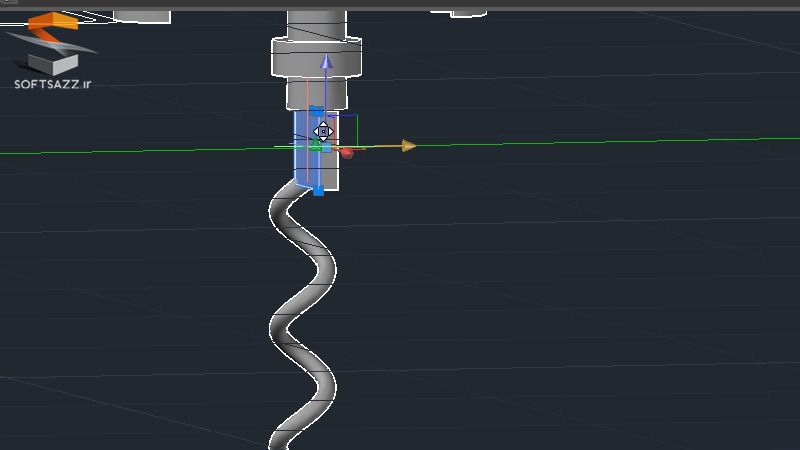
- نحوه استفاده از دستور Helix برای ایجاد پیچ چوب پنبه
- ایجاد دسته از پیچ چوب
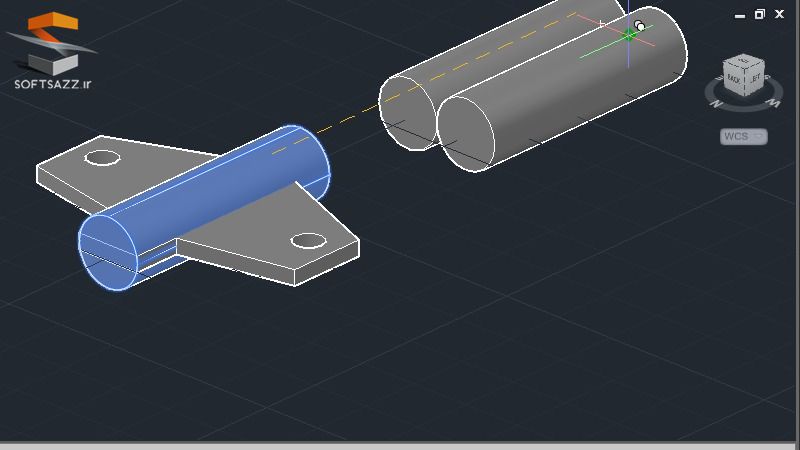
- ایجاد بازو و شانه
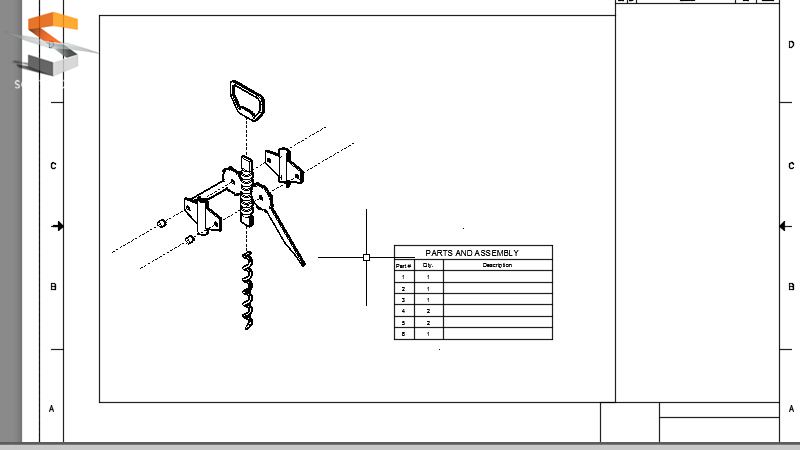
- اضافه کردن چند گروه و جداول به نقاشی های مونتاژ
- و…
تصاویری از این دوره آموزشی:

لطفا قبل از دانلود پیش نمایش دوره را مشاهده فرمایید:
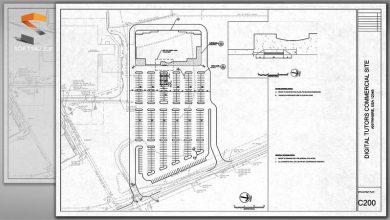
عنوان دوره : Digital Tutors – Creating Assembly Drawings in AutoCAD
سطح : متوسط
زمان کل دوره : 1 ساعت و 23 دقیقه
تعداد فایل های تصویری : 11
سال آموزش : 2015
فایل تمرینی : دارد
مربی دوره : Pierre Derenoncourt
نرم افزار : AutoCAD 2015
زیرنویس : ندارد
Digital Tutors – Creating Assembly Drawings in AutoCAD
In this set of tutorials, we’ll learn how to use AutoCAD’s 3D environment and tools to create assembly drawings. We’ll begin by modeling the exterior shell of the bottle opener using several surface and solid modeling tools including planar, extrude, and subtract, just to name a few. From there, we’ll continue using solid and surface modeling tools to create the rest of the 3D model. Once the model is complete, we’ll work in Layout to create a view that we’ll annotate with multileaders, text, and even a parts and assembly table. By the end of this course, you’ll be able to use the 3D environment in AutoCAD to create technical drawings with speed and efficiency.
Introduction and project overview
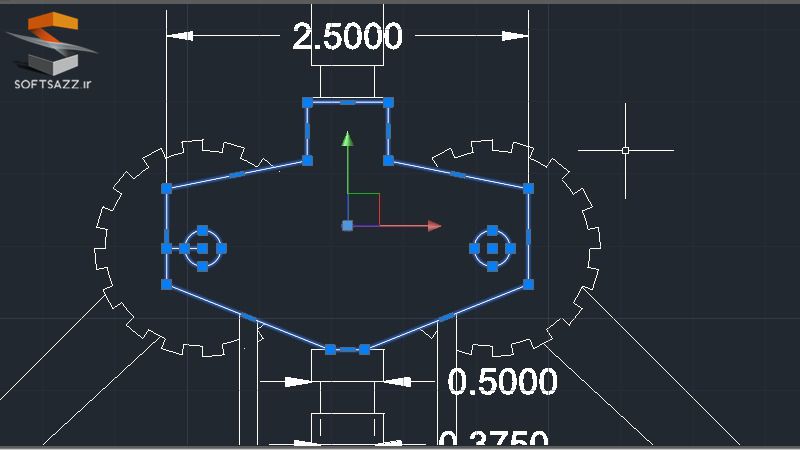
Creating the body of the bottle opener
Creating surfaces and solids from 2D lines
Creating the stem of the bottle opener
Creating the connectors and screw for the opener
Using the Helix command to create a cork screw
Creating the handle of the cork screw
Creating the arm and shoulders
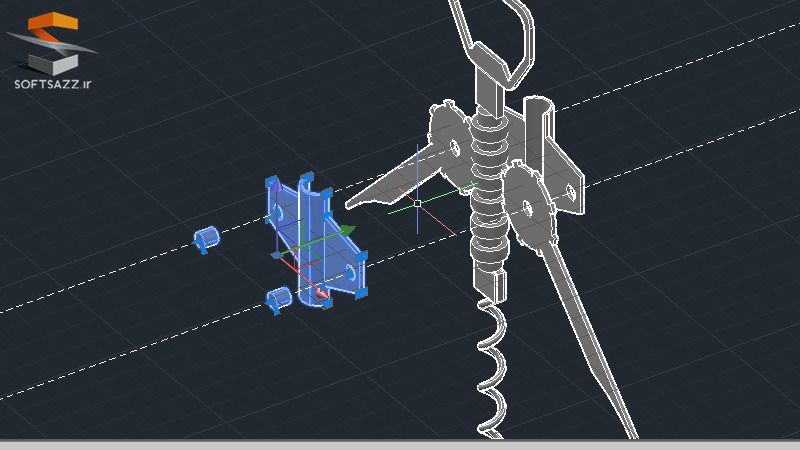
Creating a displacement view for the model
Adding mulitileaders and tables to assembly drawings
Completing the annotation of the assembly drawing
حجم کل :

برای دسترسی به کل محتویات سایت عضو ویژه سایت شوید
برای نمایش این مطلب و دسترسی به هزاران مطالب آموزشی نسبت به تهیه اکانت ویژه از لینک زیر اقدام کنید .
دریافت اشتراک ویژه
مزیت های عضویت ویژه :
- دسترسی به همه مطالب سافت ساز بدون هیچ گونه محدودیتی
- آپدیت روزانه مطالب سایت از بهترین سایت های سی جی
- بدون تبلیغ ! بله با تهیه اکانت ویژه دیگه خبری از تبلیغ نیست
- دسترسی به آموزش نصب کامل پلاگین ها و نرم افزار ها
اگر در تهیه اشتراک ویژه مشکل دارید میتونید از این لینک راهنمایی تهیه اشتراک ویژه رو مطالعه کنید . لینک راهنما
For International user, You can also stay connected with online support. email : info@softsaaz.ir telegram : @SoftSaaz
امتیاز
جمع امتیاز
لطفا به این آموزش امتیاز بدهید