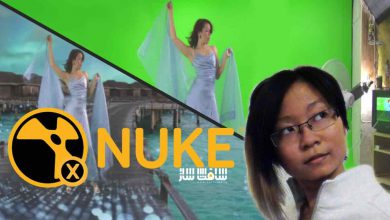
آموزش ایجاد جلوه های ویژه در After Effects
FXPHD – AFX 101 – After Effects VFX Bootcamp
آموزش ایجاد جلوه های ویژه
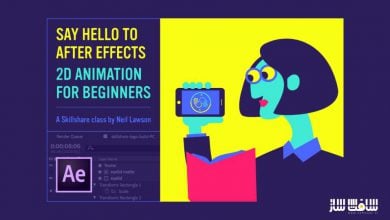
آموزش ایجاد جلوه های ویژه : با به کارگیری تمرین و آموزشهای این دوره شما قادر به ساخت جلوه های ویژه در نرم افزار افتر افکت هستید. در فصل های نخست مدرس یک مرور اجمالی به نرم افزار After Effects دارد تا کسانی که برای اولین بار است که با این نرم افزار توانمند رو به رو میشوند از مواجهه با آن ترس نداشته باشند.
مدرس این دوره نزدیک 18سال سابقه حضور در پروژه جلوه های ویژه دارد به همین خاطر شما با تکیه بر دانش این استاد چیره دست میتوانید خالق صحنه های بی نظیری در افتر افکت باشید. این دوره آموزشی توسط تیم ســافــت ســاز برای شما عزیزان تهیه شده است.
عناوین اصلی دوره آموزشی :
- مقدماتی
- مدیریت لایه و صحنه ها
- تقسیم بندی پروژه
- تصحیح رنگ شات ها
- جایگزینی آسمان
- ساخت المان دود
- ساخت افکت اختصاصی

عنوان دوره : FXPHD – AFX 101 – After Effects VFX Bootcamp
سطح : متوسط
زمان کل دوره : 12 ساعت
تعداد فایل های تصویری : 13
سال آموزش : 2019
فایل تمرینی : دارد
مربی دوره : JONATHAN ALENSKAS
نرم افزار : After Effects
زیرنویس انگلیسی : ندارد
FXPHD – AFX 101 – After Effects VFX Bootcamp
This production level VFX course, taught by Jonathan Alenskas, shares practical knowledge and experience to prepare you to be able to work on and deliver VFX shots using After Effects. A wide range of approaches and techniques will be discussed as you step through the shots given to work on – with advice on how to quickly get a shot looking good and ready for delivery to your client.
You should have some experience in After effects in order to keep up with the course, but if you are a newbie don’t be scared away. Jump in and use the online help or manuals to look up extra info on anything you don’t understand – its the best way to learn!
CLASS 1: INTRODUCTION AND PROJECT SETUP
Avoiding plugins when possible is an aim for this course, but there are a few essentials for the job which are covered to start out. Next, an administrative viewpoint of creating the folder structure and file management, which is vital to keep your projects neat, tidy, and efficient so you can concentrate on the art of VFX. Next, the class gets technical, setting up a 32-bit linear workspace, discussing colour pipeline, and saving a project template so that we don’t need to do it every time.
CLASS 2: GRAIN MANAGEMENT
In this class begins with building a project file for ‘Game Over’. A great deal of time is spent discussing grain management and sharing Jonathan’s “Grain Management 101” technique. It’s a setup that will work on 80% of your shots so it’s a great time saver and where it doesn’t work, we will cover workarounds in later classes.
CLASS 3: DIVING IN
This class begins by discussing how to receive your job from the client: what to ask for and look out for. A look through all the shots from ‘Game Over’ and a discussion of the work to be done while we build the After Effects project files, applying the information from classes one and two. The class ends with covering how to render output files and check and deliver your work to the client. This includes ensuring that the footage has gone through your pipeline and come out the other end with the exact same colour space in which it was received (roundtrip confirmation).
CLASS 4: ESTABLISHING SHOTS
In this class, our first task is to work on the establishing shots and relight and match grade from one shot to the next. The process will help you get a handle on how to read the Lumetri scope and use colour tools inside After Effects to match grade. The focus here is to develop your eye by learning what and how to look for key indicators in a shot which will guide you to getting a successful match. This type of colour matching and integration is one of the core skills in compositing — it is a skill that takes time to develop and train the eye.
CLASS 5: SKY REPLACEMENT
Our director has asked to make the dull grey shots look a little warmer and position the story time to be at dawn/early morning. Sound simple, well, it can be but there is a lot of detail to look at in order to make it truly beautiful. A variety of tools and approaches are used for tracking, roto, masking, pulling mattes and delicately grading and integrating a believable sky into our scene. Much attention is paid to continuity over the two shots with the final touch of adding smoke in the distant background, to emulate a war-torn environment.
CLASS 6: SKY REPLACEMENT, CONTINUED
In this class, the second sky replacement shot is worked on with the help of the 3D camera tracker.
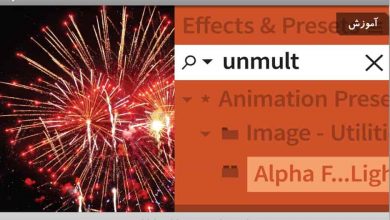
CLASS 7: SMOKE ELEMENTS
A look at real-world smoke references as smoke is added to our shots. Mocha AE is used to help speed up the roto process.
CLASS 8: SNIPER SIGHT
We emulate an optical effect for the sniper’s view through his scope as he targets our hero. A basic class but many different techniques and tips are shared which will likely apply to other shot types and workflows. For this shot, we find that the basic grain management system doesn’t work, so the manual process of grain matching is covered.
CLASS 9: MOBILE PHONE SCREEN REPLACEMENT
Mocha is used to track and build very basic roto and then applied in After Effects. The shot is finessed and you’ll also see how to build your comp so you don’t struggle with match edges of the screen and apply edge blur and light wrap for a perfect integration.
CLASS 10: BODY EFFECTS
This class involves creating a headshot wound and blood spray. The shot is tracked in Mocha and finished by applying lessons learned regarding integration. A few other tricks are covered, such as creating your own alpha channels for element plates.
CLASS 11: GROUND EFFECTS
Building upon many of the techniques from class eight, ground hits with and dust kickup is created to help sell the shot. Things get a little tricker with tracking as the areas we wish to track leave the frame, so some manual tracking adjustment needs to be done. Also, a quick look at rotobrush and refine brush.
CLASS 12: MUZZLE FLASHES
There is a lot of technique as well as further application of everything learned so far when creating muzzle flashes for our shot. This shot provides an opportunity to apply reverse stabilization to a shot.
CLASS 13
In this last class for the course, we look at some approaches to performing minimal digital makeup in the form of beauty work. We utilise techniques expanded upon what we have previously learnt in the course to delicately and realistically remove blemishes, soften skin and restore a glowing youthfulness to the actor. These methods will expand our techniques and understanding of comp order and manipulation in general.
حجم کل : 14.5 گیگابایت

برای دسترسی به کل محتویات سایت عضو ویژه سایت شوید
برای نمایش این مطلب و دسترسی به هزاران مطالب آموزشی نسبت به تهیه اکانت ویژه از لینک زیر اقدام کنید .
دریافت اشتراک ویژه
مزیت های عضویت ویژه :
- دسترسی به همه مطالب سافت ساز بدون هیچ گونه محدودیتی
- آپدیت روزانه مطالب سایت از بهترین سایت های سی جی
- بدون تبلیغ ! بله با تهیه اکانت ویژه دیگه خبری از تبلیغ نیست
- دسترسی به آموزش نصب کامل پلاگین ها و نرم افزار ها
اگر در تهیه اشتراک ویژه مشکل دارید میتونید از این لینک راهنمایی تهیه اشتراک ویژه رو مطالعه کنید . لینک راهنما
For International user, You can also stay connected with online support. email : info@softsaaz.ir telegram : @SoftSaaz
امتیاز به این مطلب :
امتیاز سافت ساز
لطفا به این مطلب امتیاز دهید :)