آموزش فتوگرامتری با Metashape و Nuke
FXPHD – NUK245 – Photogrammetry with Metashape and Nuke
آموزش فتوگرامتری با Metashape و Nuke
آموزش فتوگرامتری با Metashape و Nuke : آیا فتوگرامتری بدون نرم افزار های سه بعدی امکان پذیر است ؟ پاسخ این سوال مثبت است. این دوره برای کسانی طراحی شده که میخواهند محیط واقعی را بدون توسل به نرم افزارهای سه بعدی وارد دنیای کامپیوتر کنند و از آن بهره ببرند.
در این مجموعه آموزشی یاد خواهید گرفت چگونه به وسیله نرم افزار Nuke عکسهای متعددی را که گرفته اید تبدیل به یک آبجکت سه بعدی کنید در این مجموعه آموزشی دو آموزش پروژه محور گنجانده شده است.
در پروژه اول نحوه فتوگرامتری در نرم افزار Nuke را فرامیگیرد در پروزه بعدی یادمیگیرید چگونه پروژه خود را در بعد کلان تری رندر و خروجی بگیرید تا بتوانید آن را در بستر بزرگتری در معرض نمایش قرار دهید. این دوره آموزشی توسط تیم ســافــت ســاز برای شما عزیزان تهیه شده است.

عنوان دوره : FXPHD – NUK245 – Photogrammetry with Metashape and Nuke
سطح : متوسط
زمان کل دوره : 6 ساعت
تعداد فایل های تصویری : 9
سال آموزش : 2019
فایل تمرینی : دارد
مربی دوره : HUGO LÉVEILLÉ
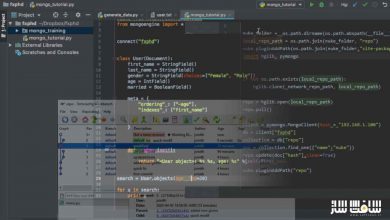
نرم افزار : Metashape – Nuke
زیرنویس انگلیسی : ندارد
FXPHD – NUK245 – Photogrammetry with Metashape and Nuke
Photogrammetry without a 3D software? Yes! This course is designed for compositors that want to integrate objects generated in Metashape without the help of a 3D software. In this course, you will learn how to solve 3D objects in Metashape from scratch and then see various tricks on how to import them inside Nuke so that you can push your composites to the next level.
The course covers two projects. The first one will be an introduction to how you can use photogrammetry along with Nuke. In the second one, you’ll take what you learn, get serious, and push things to the next level. This is the perfect training for anyone wanting to learn Metashape or any compositor that want to learn several advanced tricks in Nuke!
course syllabus
CLASS 1: THE BASICS OF PHOTOGRAMMETRY
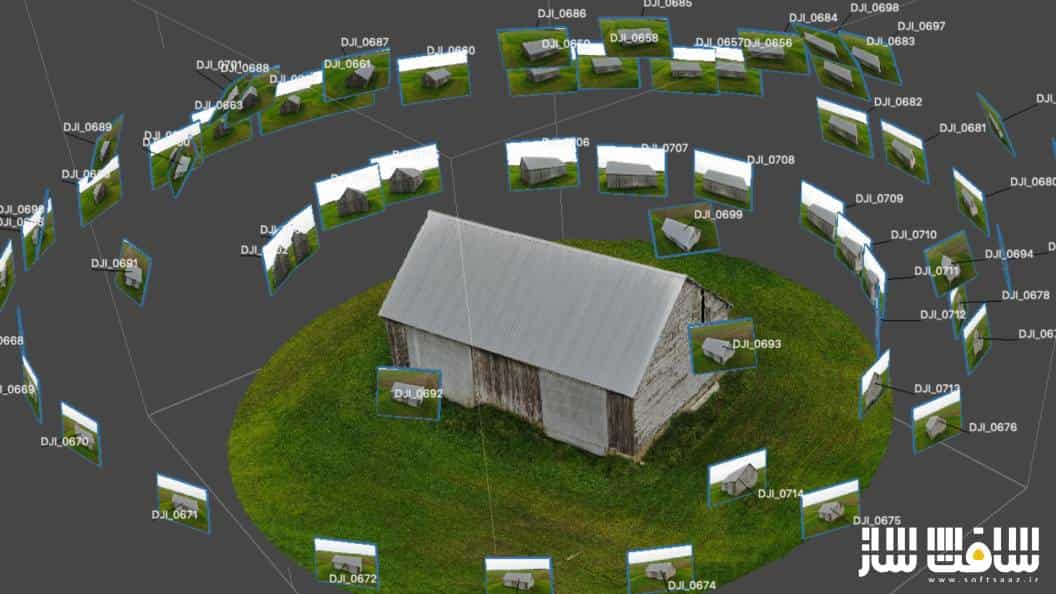
An examination of the important camera settings to make sure we get the best results in Metashape. Then, a sneak-peek of everything that will be covered in the upcoming course.
CLASS 2: METASHAPE OVERVIEW
A dive into Metashape with a look at the various steps needed to reproduce our object. We examine the important aspects of the interface as well as the various navigation tools. We go through the solving of the cameras, generating the sparse point cloud and dense point cloud and then generate our 3D mesh and how to generate a texture. The class ends with a look at how the batch processing of Metashape can be used to automate the workflow.
CLASS 3: STARING ON PROJECT ONE
We prepare our first project in Nuke. We see how to track our shot using Nuke’s 3D camera tracker. A look at how to manage the lens distortion and how to set up proxy geometry so that we can validate our camera move before importing our model.
CLASS 4: GETTING THE OBJECT INTO NUKE
How to import the geometry from Metashape as well as the solved cameras. Then, using the undistorted photos, we see how to do a re-projection of the object directly inside Nuke. Then, we’ll see how the edit geo node can sometimes help to modify the geometry without going back in a 3D software to do minor fixes.
CLASS 5: IT’S TIME TO COMP
Now that our scene is ready and we know how to import our mesh, let’s put all this together. We see how to integrate the mesh in the scene while learning some tricks like using the position pass and some edge techniques to blend the object in the composite.
CLASS 6: ADVANCED METASHAPE
Now that we know our way around Metashape, it’s time to get serious. This project will require many objects out of Metashape so we inspect what we will be using and learn other tricks like masking and editing geometry directly in Metashape to delete portions of the object and fill some holes. Then, we plan our shot in Nuke and start the tracking process, this time, using the overscan camera. We also cover how to modify our elements to accommodate this technique.
CLASS 7: PROJECT TWO: FOREGROUND ELEMENTS
We use projection techniques to blend our objects on the ground, re-project shadows, and use the FillMat node to holdout portions of our objects. The elements are integrated by re-projecting different textures, adding fire elements, as well as generating a heat shimmer effect for the fire.
CLASS 8: PROJECT TWO: FIXING PROBLEMS
Not everything is perfect, so it’s time to fix modelling problems from Metashape directly inside Nuke by using the deformGeo node. We also see how to extend our wall with the editGeo node.
CLASS 9: FINISHING TOUCHES
We put all the pieces of the puzzle together. We see how to add reflections in our scene, fake shadows, re-project the original plate with a new camera, and finalize the shot by adding motion blur.
حجم کل : 27.6 گیگابایت

برای دسترسی به کل محتویات سایت عضو ویژه سایت شوید
برای نمایش این مطلب و دسترسی به هزاران مطالب آموزشی نسبت به تهیه اکانت ویژه از لینک زیر اقدام کنید .
دریافت اشتراک ویژه
مزیت های عضویت ویژه :
- دسترسی به همه مطالب سافت ساز بدون هیچ گونه محدودیتی
- آپدیت روزانه مطالب سایت از بهترین سایت های سی جی
- بدون تبلیغ ! بله با تهیه اکانت ویژه دیگه خبری از تبلیغ نیست
- دسترسی به آموزش نصب کامل پلاگین ها و نرم افزار ها
اگر در تهیه اشتراک ویژه مشکل دارید میتونید از این لینک راهنمایی تهیه اشتراک ویژه رو مطالعه کنید . لینک راهنما
For International user, You can also stay connected with online support. email : info@softsaaz.ir telegram : @SoftSaaz
امتیاز به این مطلب :
امتیاز سافت ساز
لطفا به این مطلب امتیاز دهید :)