افکت های Houdini Pyro در هودینی Houdini
Jumpstart Vol.6 – Intro to Houdini Pyro Effects
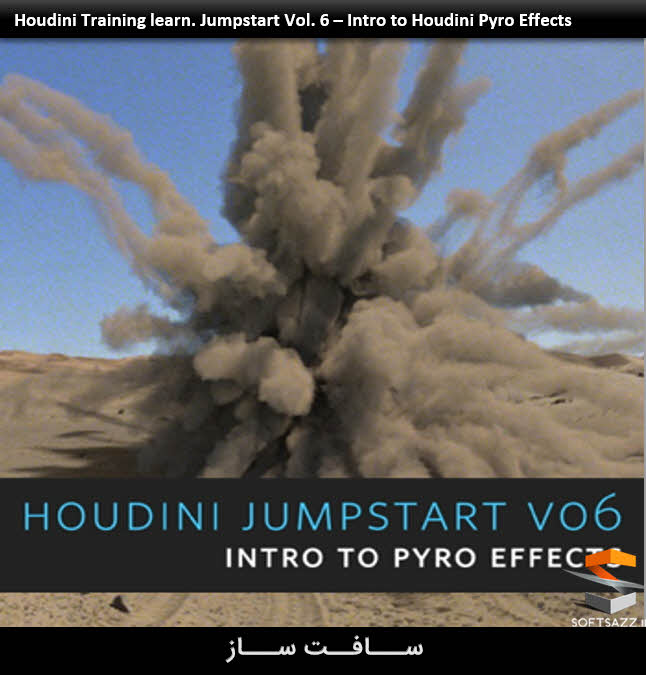
افکت های Houdini Pyro
در طول 5 ساعت محتوا و سه آموزش مبتنی بر پروژه ، دوره ” افکت های Houdini Pyro ” از شرکت helloluxx ، آدام اسوب ، نحوه شکستن و کنترل شبیه سازی pyro در Houdini رانشان می دهد. با ده ها پارامتر برای بازی کردن و tweak در پیرو ، که این میتوان تلاشی دشوار باشد.
با این وجود آدام ، چگونگی بیشترین استفاده از pyro را با نگاهی به تنظیمات کلیدی که شبیه سازی را شکل می دهد و نحوه کنترل سطح sims با نگاهی به شبیه سازی بزرگ در هودینی ، تمام روش را از تنظیمات اولیه نوپردازی ، رندرینگ و کاپوزیت را نمایش میدهد.
این آموزش با نگاهی به انواع مختلف حجم در هودینی شروع می شود ، نحوه دیدن ارزش های آن ، نیز توضیحات تفاوت بین بسیاری از انواع مختلف حجم ها را به شما مراجعین سافت ساز نشان می دهد. سپس ، یک شبیه سازی امواجی از دود ضخیم را برای اولین شبیه سازی انجام میدهد. پروژه بعدی روی ایجاد انفجار سنگ آسمانی با استفاده از یک منبع ذرات پایه ، تمرکز دارد.
نحوه استفاده از این شبیه سازی ذرات برای شکل دهی و هنر مستقیم شبیه سازی ، ارائه برخی از سطح پیش بینی شده برای pyro را یاد میگیرید. به دنبال این ، مدل احتراق pyro ، تاثیر گذاری پارامتر های مختلف بر شبیه سازی قبل از پایان آموزش را نشان می دهیم. با نگاهی به شبیه سازی انفجار گرد و خاک ، چگونگی تنظیم از یک شبیه سازی ذرات ، در نهایت رندر و کامپوزیت آن روی یک صفحه پس زمینه را نشان خواهیم داد . با سافت ساز همراه باشید.
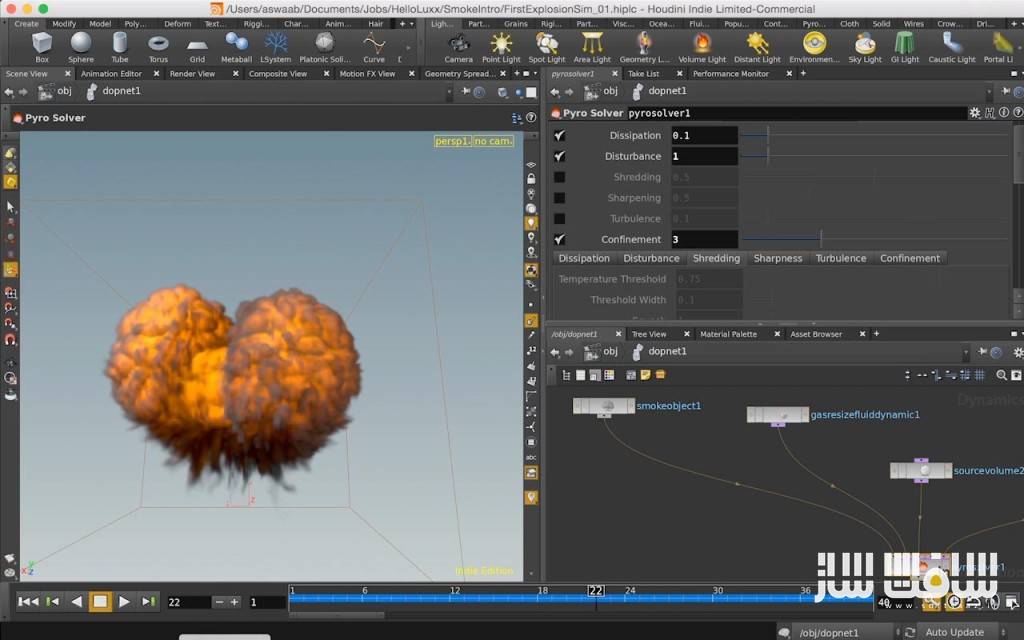
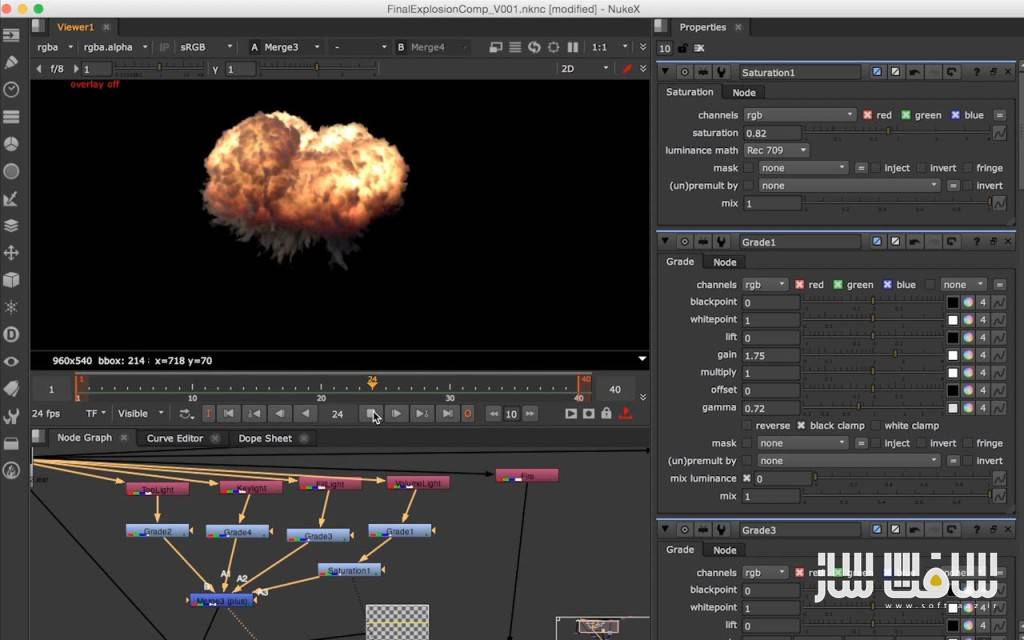
تصاویری از دوره افکت های Houdini Pyro :


پیش نمایش دوره افکت های Houdini Pyro :
عنوان دوره : Houdini Training : learn. Jumpstart Vol.6 – Intro to Houdini Pyro Effects
سطح : متوسط
زمان کل دوره : –
تعداد فایل های تصویری : 14
سال آموزش : 2017
فایل تمرینی : دارد
مربی دوره : Adam Swaab
نرم افزار : Houdini
زیرنویس : ندارد
Houdini Training : learn. Jumpstart Vol.6 – Intro to Houdini Pyro Effects
During 5+ hours of content and three project based tutorials, Intro to Houdini Pyro Effects by Adam Swaab shows how to wrangle and control pyro simulations in Houdini.With dozens of parameters to play with and tweak in pyro, it can be a daunting endeavour. However, Adam shows how to get the most out of pyro, by looking at the key settings that shape a simulation and how to get some level of control to the sims by looking at three big simulations in Houdini, all the way from initial set-up to lighting, rendering, and compositing.The tutorial starts by looking at the different kinds of volumes in Houdini, showing how to see their values, as well as explaining the differences between the many different kinds of volumes. Next is the first simulation, a thick, billowy smoke simulation. The next project focuses on creating a fireball explosion, using a particle source as a base. Learn how to use this particle simulation to shape and art direct the simulation, giving some level of predictability to pyro. Following this, go over the pyro combustion model, showing how the various parameters influence the simulation before ending the tutorial, by taking a look at a dirt explosion simulation, showing how to set it off from a particle simulation, finally rendering it and compositing it over a background plate.
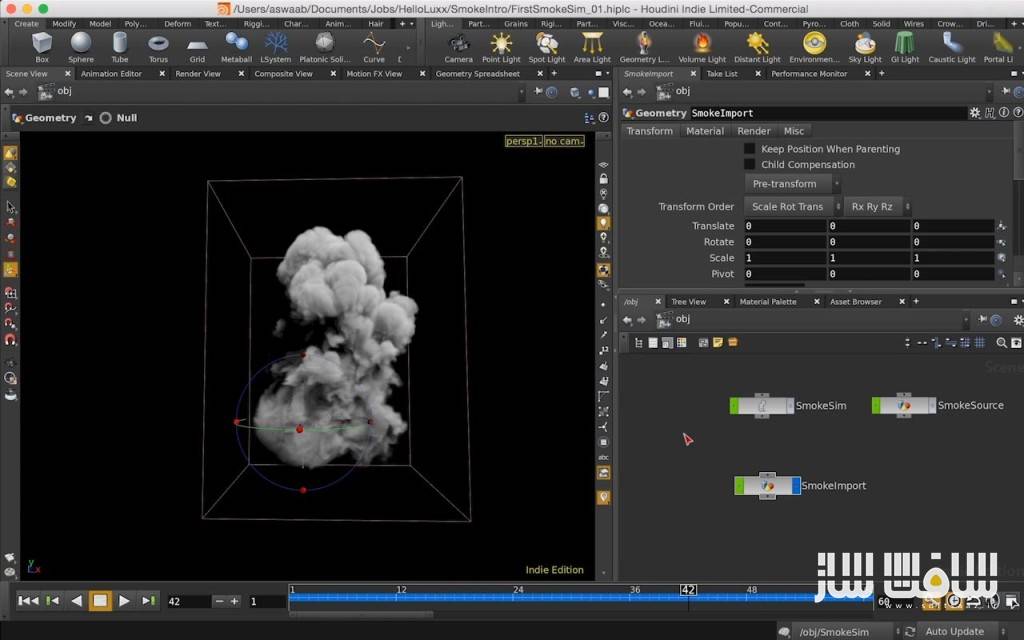
Chapter 01: Overview of volumes. We look at the different types of volumes in Houdini.
Chapter 02: Starting from scratch, we build a billowy smoke simulation, without using the shelf tools.
Chapter 03: We set up our smoke simulation for rendering.
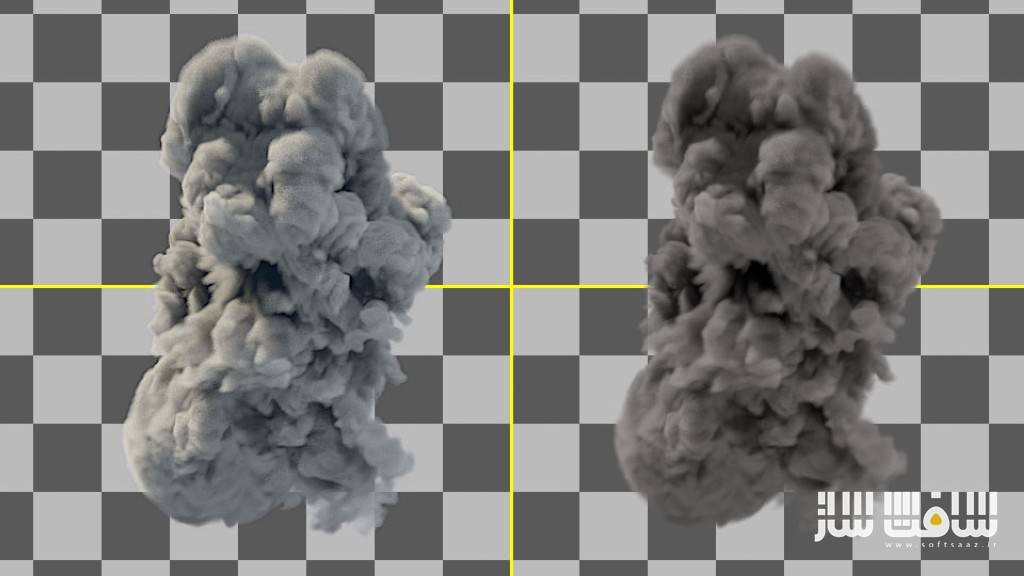
Chapter 04: We look at how to rebuild the smoke beauty in Nuke using the separate lighting layers from the .
Chapter 05: We set up a POP simulation to create fuel, temperature, and initial velocities for our explosion simulation.
Chapter 06: We turn our POP simulation into a pyro explosion.
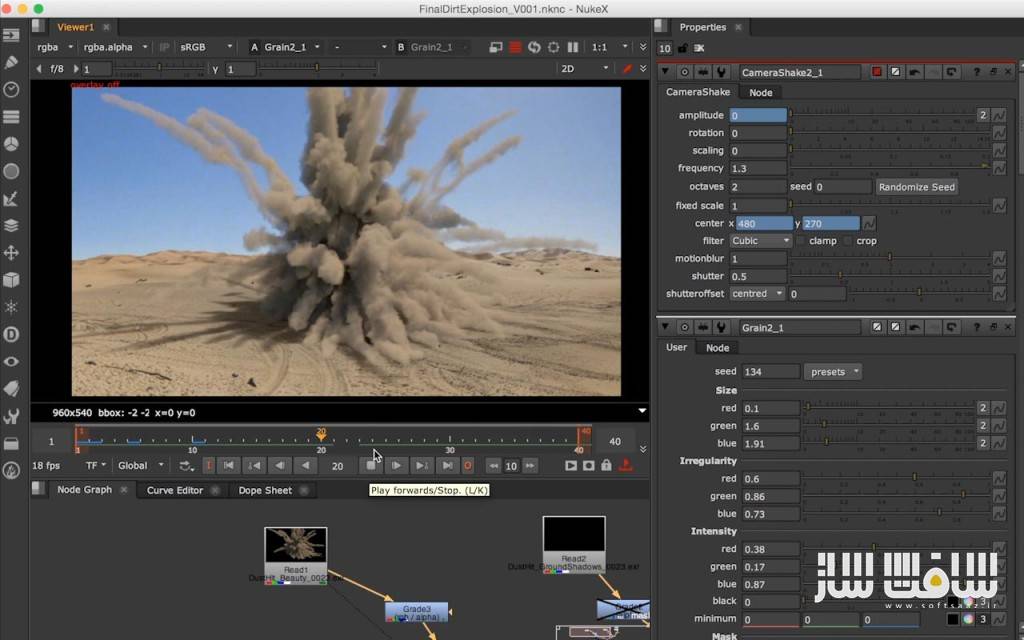
Chapter 07: We setup our explosion for rendering, looking at what image planes are needed for compositing.
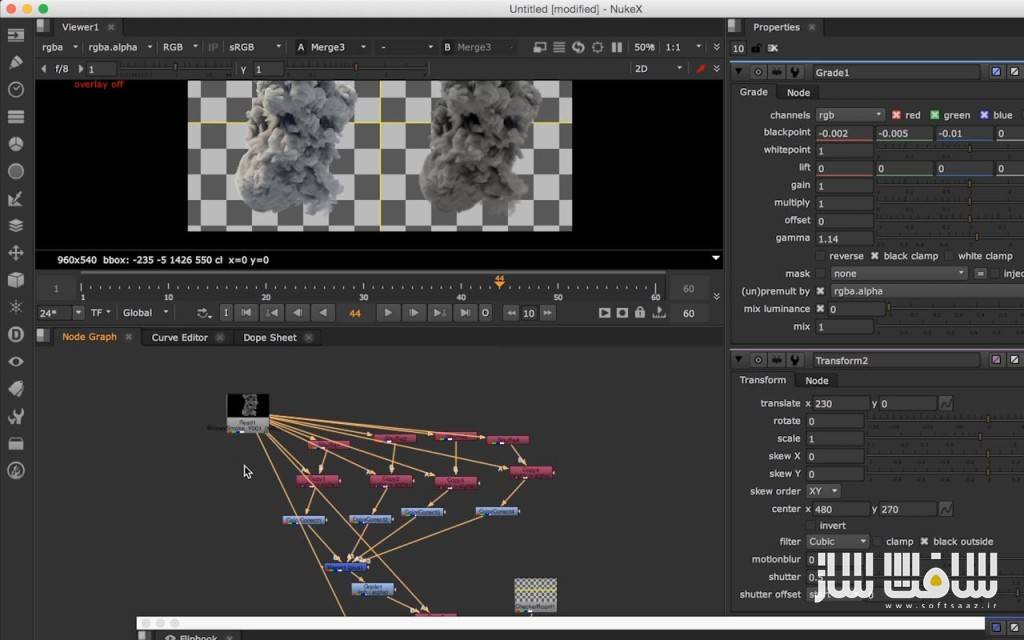
Chapter 08: In Nuke, we look at rebuilding the beauty pass and discuss how to use the individual render image planes to tweak and enhance the final explosion comp.
Chapter 09: We discuss how to use rest fields to add procedural noise to the pyro shader.
Chapter 10: We create a base particle simulation to use for our “dirt hit” pyro sim.
Chapter 11: We shape and refine our simulation in DOPS.
Chapter 12: Matching to a background plate, we look at how to render the smoke and interactive shadow pass to be used in compositing.
Chapter 13: We dissect the Nuke comp, showing how to use the rendered passes to integrate our smoke with a background plate.
حجم کل :

برای دسترسی به کل محتویات سایت عضو ویژه سایت شوید
برای نمایش این مطلب و دسترسی به هزاران مطالب آموزشی نسبت به تهیه اکانت ویژه از لینک زیر اقدام کنید .
دریافت اشتراک ویژه
مزیت های عضویت ویژه :
- دسترسی به همه مطالب سافت ساز بدون هیچ گونه محدودیتی
- آپدیت روزانه مطالب سایت از بهترین سایت های سی جی
- بدون تبلیغ ! بله با تهیه اکانت ویژه دیگه خبری از تبلیغ نیست
- دسترسی به آموزش نصب کامل پلاگین ها و نرم افزار ها
اگر در تهیه اشتراک ویژه مشکل دارید میتونید از این لینک راهنمایی تهیه اشتراک ویژه رو مطالعه کنید . لینک راهنما
For International user, You can also stay connected with online support. email : info@softsaaz.ir telegram : @SoftSaaz
امتیاز دهی به این مطلب :
امتیاز سافت ساز - 82%
82%
لطفا به این مطلب امتیاز دهید ?