آموزش رندرینگ آرنولد 5 در Maya
Lynda – Maya: Rendering with Arnold 5

آموزش رندرینگ آرنولد 5 در Maya
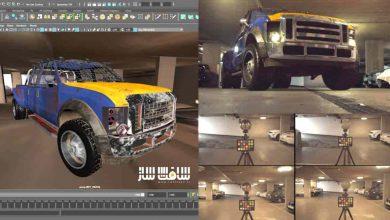
Arnold ، انجین رندرینگ جدید بسیار با کیفیت در Maya 2017 می باشد. رندرینگ واقعی در مایا بسیار راحتر تر از همیشه با این brute force Monte Carlo ray tracer است . رندرینگ بر اساس فیزیک آرنولد با دقت ، نور را دنیای واقعی شبیه سازی می کند ، این دوره مروری کلی بر ویژگی های اصلی انجین آرنولد برای نور پردازی ، متریال دهی و رندرینگ در مایا به شما مراجعین عزیز سافت ساز می آموزد.
عناوین اصلی این دوره آموزشی:
- مفاهیم رندرینگ آرنولد
- نورپردازی با مایا و نور های آرنولد
- کنترل Exposure
- فیلترینگ نور با Barndoor و Gobo
- Light attenuation با decay
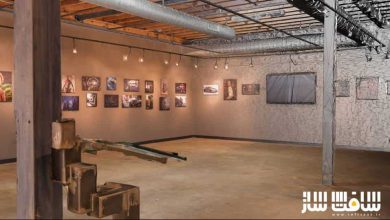
- نورپردازی مبتنی بر تصویر با SkyDome
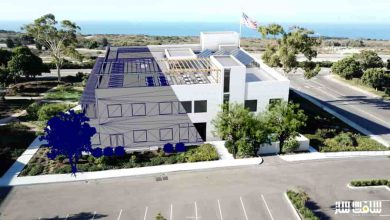
- نور روز (daylight ) خارجی با Physical Sky
- ویژگی های متریال استاندارد آرنولد
- ویژگی های متریال نقشه برداری
- رندرینگ refraction
- مش subdivision و displacement در زمان رندرینگ
- افکت های شیدینگ از جمله ambient occlusion و vertex color
- افکت های دوربین از جمله fisheye ، depth of field
- رندرینگ توالی تصاویر انیمیشن
- و …

لطفا قبل از دانلود پیش نمایش دوره را مشاهده فرمایید:
عنوان دوره : Lynda – Maya: Rendering with Arnold 5
سطح : متوسط
زمان کل دوره : 2 ساعت و 22 دقیقه
تعداد فایل های تصویری : 32
سال آموزش : 2017
فایل تمرینی : دارد
مربی دوره : Aaron F. Ross
نرم افزار : Maya , Arnold 5
زیرنویس : ندارد
Lynda – Maya: Rendering with Arnold 5
Arnold is the new high-quality rendering engine in Maya 2017. Realistic rendering in Maya is easier than ever with this brute force Monte Carlo ray tracer. Arnold’s physically based rendering accurately simulates light in the real world, but allows breaking physical laws to achieve artistic styles. This course is an overview of Arnold’s core features for lighting, materials, and rendering in Maya.
Topics include:
Arnold rendering concepts
Lighting with Maya and Arnold lights
Controlling exposure
Filtering light with Barndoor and Gobo
Light attenuation with decay
Image-based lighting with SkyDome
Exterior daylight with Physical Sky
Arnold standard material attributes
Mapping material attributes
Rendering refractions
Mesh subdivision and displacement at render time
Shading effects such as ambient occlusion and vertex color
Camera effects such as fisheye and depth of field
Animation image sequence rendering
1. Concepts
Course prerequisites 2m 11s
Introducing Arnold 4m 24s
Arnold rendering concepts 3m 43s
Controlling processing in Render Settings 3m 15s
Interactivity in the Arnold RenderView 7m 50s
Balancing sampling and Ray Depth 10m 44s
2. Studio Lighting
Creating an Arnold area light 5m 15s
Setting Ai Area Light attributes 5m 29s
Controlling camera exposure 2m 43s
Rigging a spot light 4m 53s
Focusing a spot light 7m 40s
Masking a spot light with gobo filter 3m 57s
Adding suffuse illumination 4m 12s
Fine tuning lights and rendering 4m 33s
Attenuation with Light Decay filter 8m 24s
3. Natural and Environmental Lighting
Image-based lighting with Ai Skydome light 5m 54s
Directing Skydome light visibility 3m 54s
Exterior daylight with Physical Sky 4m 1s
Interior daylight with a Skydome 8m 6s
Increasing Skydome render sampling 3m 57s
4. Materials and Mapping
Setting Ai Standard Surface material attributes 9m 14s
Mapping opacity with an alpha channel 4m 32s
Controlling specular roughness 7m 19s
Shading with ambient occlusion 6m 53s
Building an Arnold shading network 6m 5s
Rendering refractions with transmission 9m 21s
Rendering vertex color with Ai UserData Color 4m 6s
Wireframe analysis with Ai Utility shader 3m 20s
Smooth mesh subdivisions at render time 3m 2s
Deforming a mesh with displacement 8m 6s
Displacement, subdivisions, and bump mapping 4m 54s
5. Rendering
Atmospheric perspective with Ai Fog 6m 1s
Lens distortion with fisheye camera 2m 56s
Rendering a panorama 4m 17s
Rendering light and object passes with AOVs 9m 23s
Compositing AOVs in Photoshop 4m 17s
Rendering bokeh with depth of field 6m 46s
Rendering an image sequence 6m 27s
حجم کل :

برای دسترسی به کل محتویات سایت عضو ویژه سایت شوید
برای نمایش این مطلب و دسترسی به هزاران مطالب آموزشی نسبت به تهیه اکانت ویژه از لینک زیر اقدام کنید .
دریافت اشتراک ویژه
مزیت های عضویت ویژه :
- دسترسی به همه مطالب سافت ساز بدون هیچ گونه محدودیتی
- آپدیت روزانه مطالب سایت از بهترین سایت های سی جی
- بدون تبلیغ ! بله با تهیه اکانت ویژه دیگه خبری از تبلیغ نیست
- دسترسی به آموزش نصب کامل پلاگین ها و نرم افزار ها
اگر در تهیه اشتراک ویژه مشکل دارید میتونید از این لینک راهنمایی تهیه اشتراک ویژه رو مطالعه کنید . لینک راهنما
For International user, You can also stay connected with online support. email : info@softsaaz.ir telegram : @SoftSaaz
امتیاز
جمع امتیاز
لطفا به این آموزش امتیاز بدهید